
Should You Pay for a Digital Vault or Stick to Free?
We have all been there. You want to log into your online gas bill, check your premium bonds, or order something from Marks & Spencer, and the computer screen coldly informs you that your password is incorrect.
In the old days, we had a simple system: a worn-out little address book kept by the telephone, filled with scribbled words and crossed-out numbers.
But nowadays, websites demand a bizarre recipe of capital letters, numbers, and special symbols just to let you buy a pair of socks.
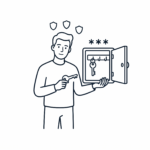
To solve this, modern technology offers us something called a Password Manager. Think of it as a secure, electronic filing cabinet. Instead of remembering fifty different complicated passwords, you only have to remember one single “Master Key” to unlock the cabinet. The cabinet then does all the heavy lifting for you.
🤝 Earning Your Trust: Our Honest Approach
A lot of websites will tell you that you must buy a premium, expensive piece of software immediately. We do not agree with that. Trust is earned through total honesty, not sales pitches.
The absolute truth is that the right choice depends entirely on two things: your household budget and how confident you feel using a computer or tablet.
To help you make the right choice, we have broken down the three distinct routes you can take today, complete with the honest pros and cons for each.
Option 1: The Built-In Browser Saver (The “Zero-Cost, Zero-Fuss” Route)
When you type a password into a website, your computer screen will often pop up with a friendly question: “Would you like me to save this password?” This is your web browser (like Google Chrome, Apple Safari, or Microsoft Edge) offering to look after things for you.
Whenever you return to that website, it uses Auto-fill—which is just a fancy way of saying it automatically types your details into the blanks so you can click straight through.
👍 The Pros:
- Completely Free: It costs absolutely zero pence and is already built into your device.
- No Setup Required: You don’t have to download any new programmes or fill out any registration forms.
- Incredibly Convenient: It fills in the blanks the second you arrive at a website.
👎 The Cons:
- The Coffee Table Risk: Browser savers stay unlocked as long as your computer or iPad is switched on. If you leave your tablet on the coffee table and a visiting grandchild picks it up to play a game, they could accidentally open your email or shopping accounts without needing a password.
- The Brand Monopoly: Google saves passwords perfectly, provided you stay inside Google Chrome. Apple saves them perfectly, provided you use an iPhone or iPad. But if you look at your emails on a Windows desktop machine and use an Apple iPad on the sofa, these free systems find it very difficult to talk to each other.
Option 2: The Independent Free Vault (The “Clever Compromise”)
If you want better security than a web browser but don’t want to pay a single penny, you can use a dedicated, independent free vault like Bitwarden or Proton Pass.
PCMag UK recently rated Proton Pass, as one of the best free vaults on the market today. It works smoothly across all your different household devices.”
These are highly secure, standalone programmes that sit on your computer or phone. Their entire job is to guard your data, and they are completely unhackable.
👍 The Pros:
- Completely Free: These aren’t temporary “free trials”—they are genuinely free for life. PanicVault
- Cross-Device Harmony: They act as an independent bridge. It doesn’t matter if you use a Windows laptop, a Samsung phone, or an Apple iPad; your passwords will securely follow you across all of them.
- Independent Lock: Unlike web browsers, these vaults lock themselves shut after a few minutes of inactivity. Even if someone picks up your device, your bank details remain under lock and key.
👎 The Cons:
- A Bit of Technical “Elbow Grease”: You will need to download the app yourself and set up an account, which takes about ten minutes of concentration.
- The “Two-App Shuffle”: Many modern accounts now require Two-Factor Authentication (2FA). This is a security layer that requires you to enter a temporary 6-digit code sent to your mobile phone to prove it’s really you. With a free vault, you usually have to open a separate app on your phone to find that code, then manually type it in before the timer runs out. It can feel a bit like rubbing your stomach and patting your head at the same time.
Option 3: The Paid Premium Safe (The “Rolls-Royce” Treatment)
This is the top tier. Companies like 1Password or NordPass offer premium, independent vaults. They do not offer permanently free versions; instead, they operate on an annual subscription.
1Password is in the Tool Shed.
NordPass is in the Tool Shed
The Financial Reality Check: While they advertise their prices as a few pounds a month, they almost always bill you for the entire year all at once. You should expect an upfront cost of roughly £35 to £50 each year to keep the software active.
👍 The Pros:
- Total Automation: Paid vaults completely eliminate the “Two-App Shuffle.” They securely hold your password and generate your 2FA security codes within the exact same box, automatically filling them both into the website instantly.
- The Electronic Safe Deposit Box: You can use a premium vault to store more than just website words. You can upload highly encrypted digital scans of your physical passport, driving license, vehicle logbooks, or even a copy of your Will. Bitwarden
- The Emergency Legacy Plan: This is the most important feature for couples. If a partner suddenly falls ill, navigating the household finances is incredibly stressful. Paid vaults offer a “Family” plan with a shared household section. Both partners have real-time access to the electricity bills, broadband logins, and insurance portals, ensuring no one is ever locked out during a family crisis as available with 1Password
👎 The Cons:
- The Recurring Bill: It is a permanent financial commitment. If you decide to cancel the subscription in the future, you lose access to the premium automated features.
⚖️ The Verdict: Which Choice Fits Your Life?
We want to be absolutely clear: Usability is security. If a tool is too frustrating or complicated for you to use, you will eventually abandon it and go back to writing passwords on a scrap of paper under the kettle—which leaves you completely unprotected.
Our encouraging, honest advice to the Wise Old Heads community is to base your decision on your current financial comfort:
- If your household budget is tightly managed: Do not stretch yourself for a premium subscription. Choose Option 2 (The Independent Free Vault like Bitwarden). It gives you maximum, unhackable protection for zero pounds, as long as you don’t mind a little bit of manual copying and pasting. PanicVault
- If you have the financial breathing room: Investing £40 a year into Option 3 (A Premium Vault like 1Password) is worth every single penny. It turns cybersecurity into a simple, one-click process, completely removes the headache of typing extra security codes, and provides a beautiful, clear legacy safety net for your spouse and children.
Our searchable WiseOldHeads library is packed with helpful advice, jargon-free consumer guides designed specifically to protect your cash and your peace of mind. Leverage our search bar below to stay one step ahead of the corporate giants.